A new user interface for selecting or uploading images within a content area has been updated. The interface features a refreshed look and is easier to use.
Note: when uploading images, their default destination is the recommended folder /site-assets/images.
These instructions are for selecting an Internal image, which is an image located on the website. If the image has not yet been uploaded to the website, you have the option to upload an image in the selector user interface as well.
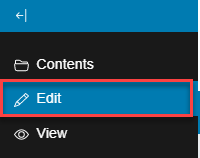
- Go to the page to Edit and select Edit
- Scroll down to the text editor area.
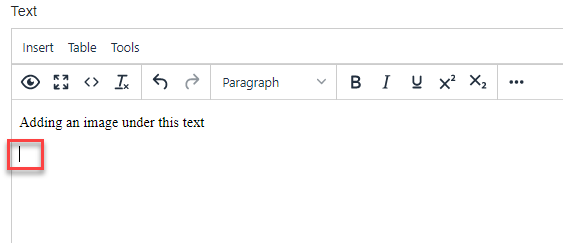
- Find the area of the item's content where you would like to add an image and left click there to set your cursor.
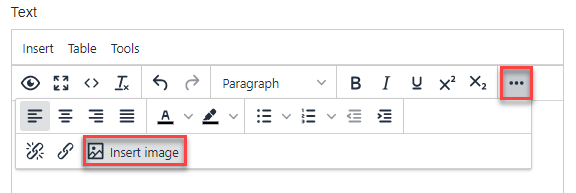
- On the editor's toolbar, select the Insert image button (it looks like a small mountain with the sun) to open the Insert/edit image dialog.
- The interface for adding images will now open and look similar to this. At the top left are two tabs: Internal image is for using images located on the website, and External image is for linking images from outside your website. These instructions are for Internal Images.
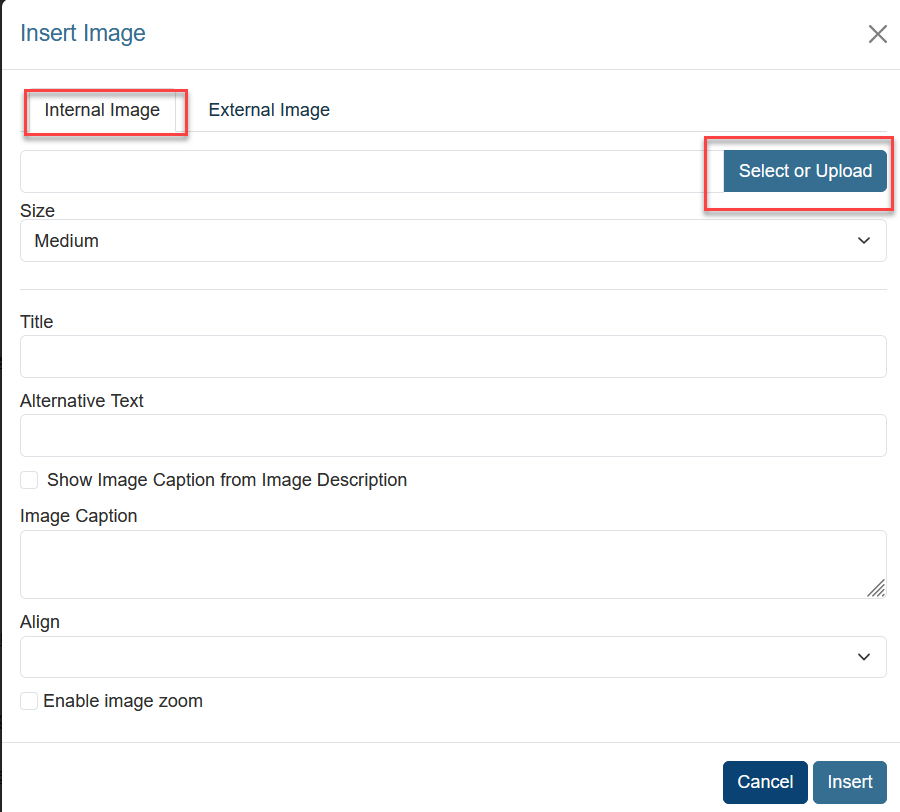
- The tab selected should be the Internal image.
- To upload an image from your computer
- Click the Select or Upload button and the following popup will display
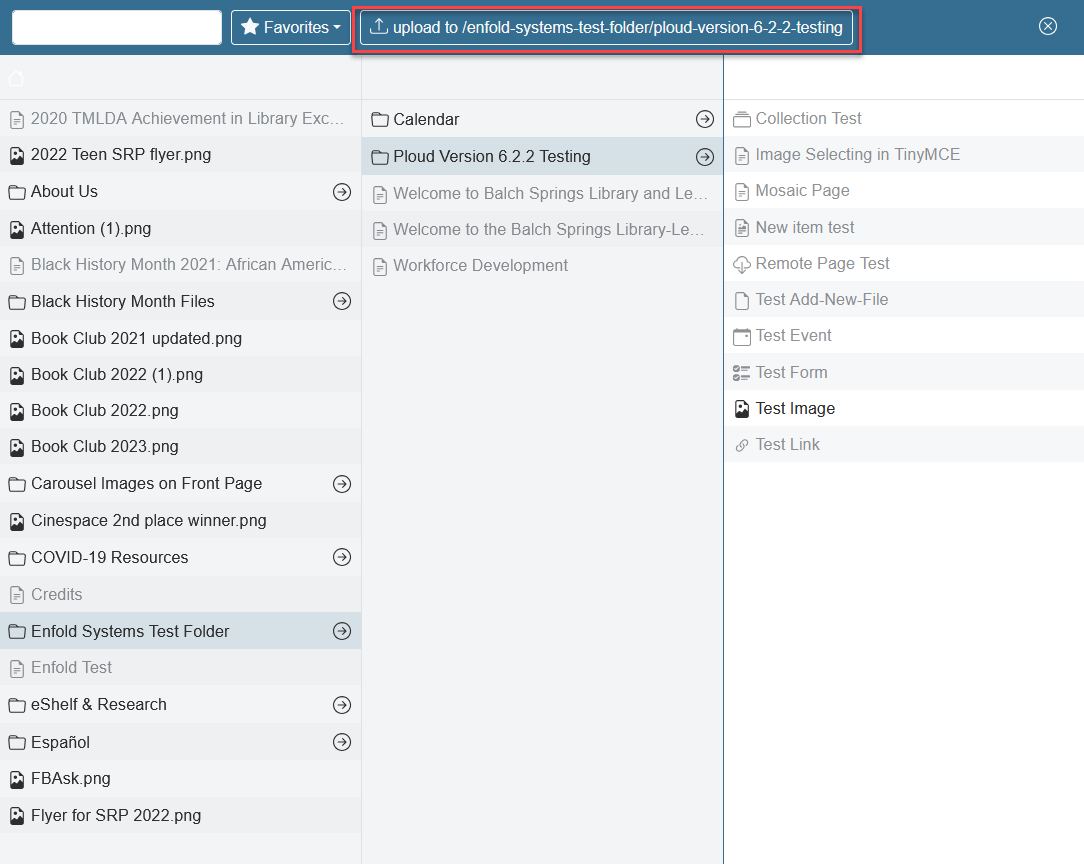
- A popup to the right will appear labeled Upload here. Note: regardless of what the button says, the default destination is /site-assets/images.
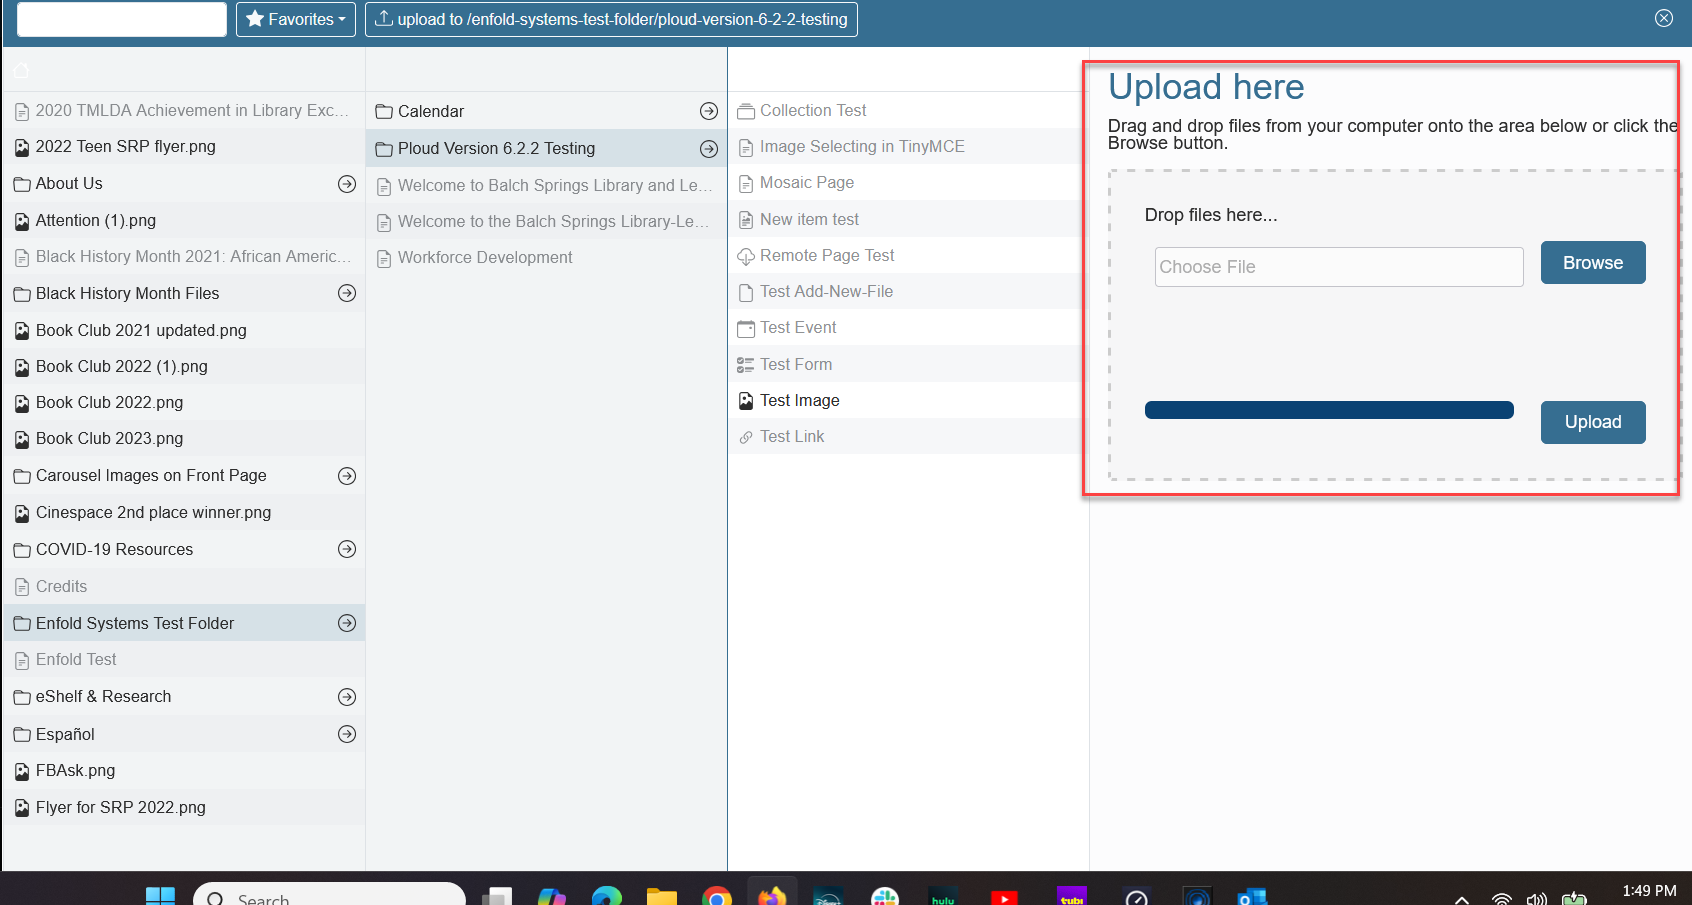
- Selecting the Browse button opens the file explorer and allows you to locate the image you wish to upload from your computer.
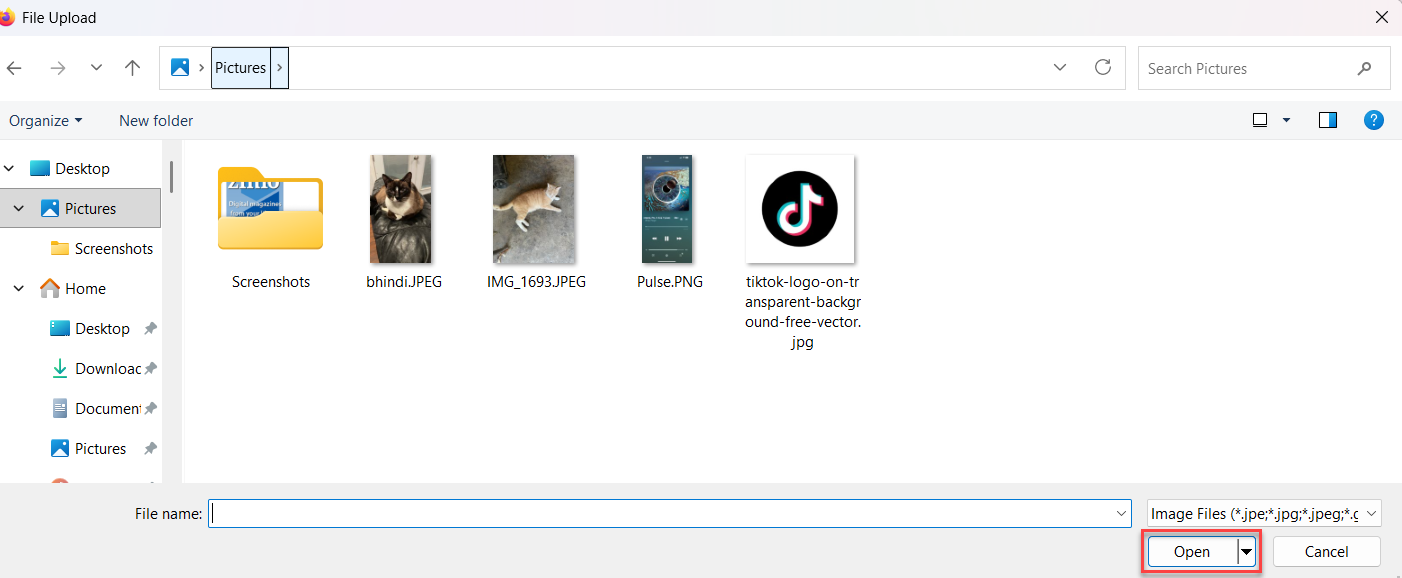
- After selecting the image and clicking Open, then Upload, it will be uploaded to /site-assets/images/
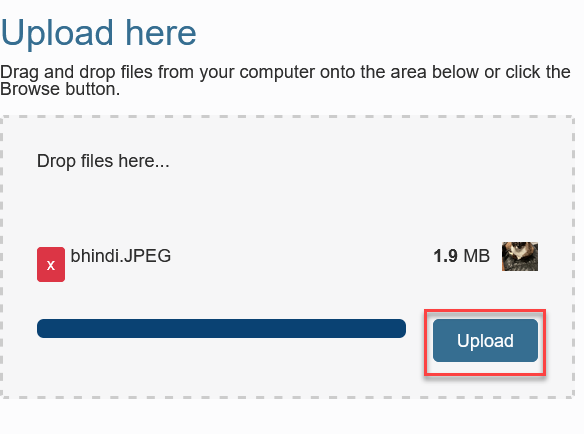 . The image will be placed as the selected image when you click the Insert button. Make sure to fill out the Title and Alternative text fields. (Note: the alternative text field is important to remain WCAG compliant for text readers for visually impaired readers.)
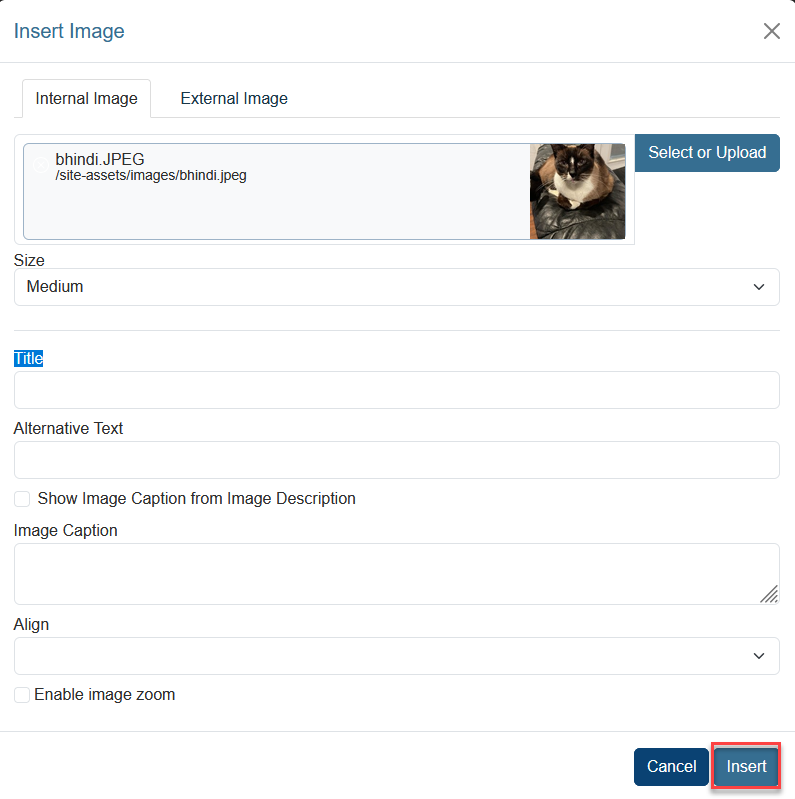
Selecting images already on the computer
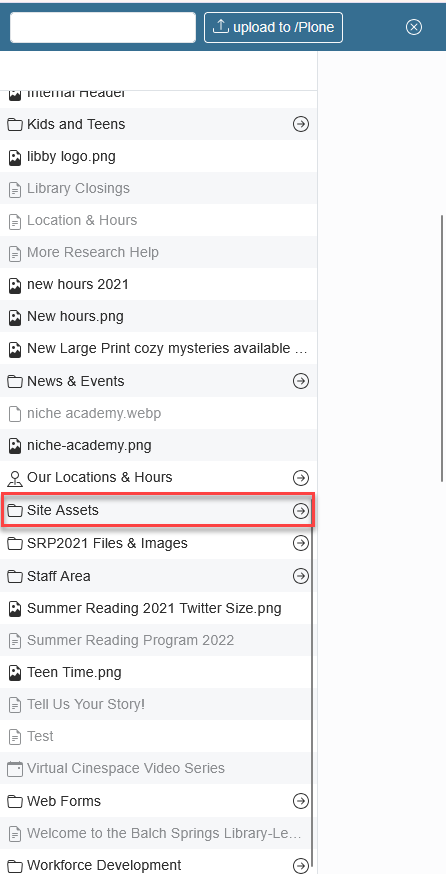
The items in the list have an icon to the left of the name on the highlighted Site Assets line. The icon indicates a folder, and you can open that folder by clicking the arrow on the right. A search box is available at the top left. It will only search images in the current folder. To find a specific folder, you may need to scroll down the list.
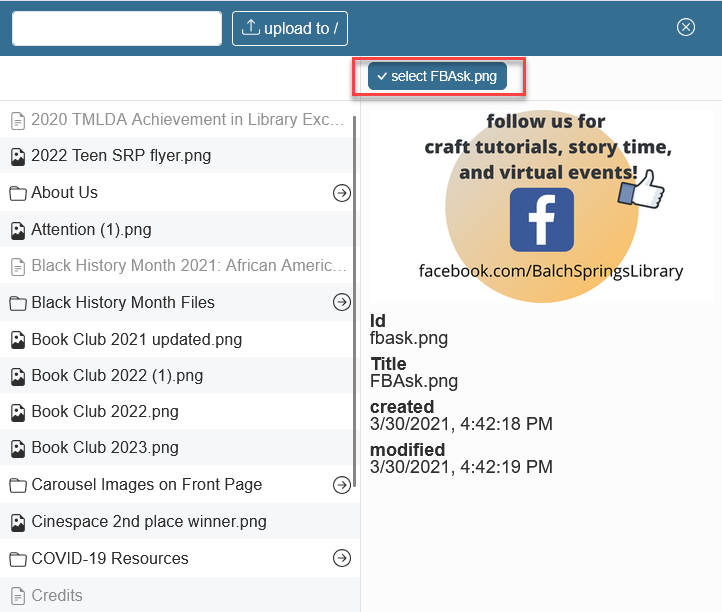
Click on the desired image and a description of the image as well as what the image looks like will be displayed. To select that image, click the Select button.
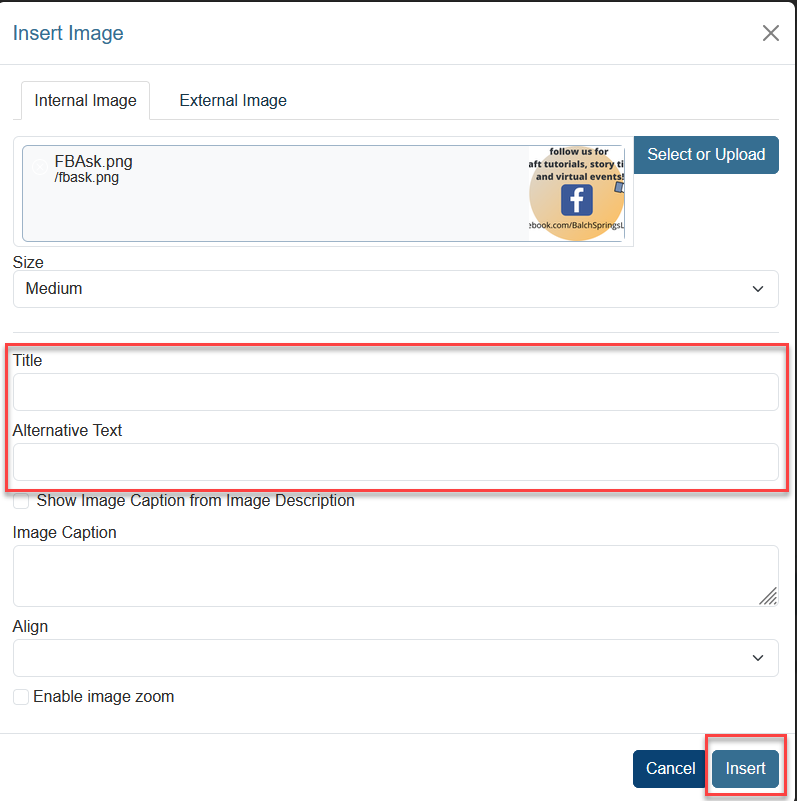
And the image will be placed as the selected image to Insert when you click the Insert button. Make sure to fill out the Title and Alternative text fields. Note: the alternative text field is important to remain WCAG compliant for text readers for visually impaired readers.
Was this article helpful?
That’s Great!
Thank you for your feedback
Sorry! We couldn't be helpful
Thank you for your feedback
Feedback sent
We appreciate your effort and will try to fix the article